

Design Space App For Iphone
Using the Cricut Design Space App is a great way to enjoy your machine, you can access your images, ready to cut projects, and best of all, you DON'T need the Internet!
If you are already familiar with the Desktop version of Cricut Design Space, you will find this App very easy to navigate. Just dive in, tap, explore, and don't be nervous, your Phone or Ipad won't explode!
On the other hand, if you have no experience whatsoever, this is the best place for you to be, this article will take you on every single little icon the App has.
I understand that learning a new skill can be a little frustrating at times, but when you take the time and are patient with it, you can become an expert.
Since most of the screenshots you will see next are taken from my iPad, I want to point out the differences you will find between the Ipad and iPhone version.
Is there any difference between the Design Space App for iPhone and iPad?
Lucky for you and me there's not a big difference between these two options. Can you imagine trying to learn two different apps?
The only tiny difference between the App for iPhone and Ipad is SPACE MANAGEMENT.
You will notice this first on the top panel where it sale (Home – Canvas – Make) on the iPad you will always see the names, but on the phone, sometimes, you will see a rectangle divided into three equal parts. However, they both represent the same thing.
Something to keep in mind as well is that most of the time when you tap on something the menus are very long, so with the phone you will have to slide them to the left and right to see all the options – sometimes with the iPad too.
Also, since space is so limited, on your phone, the layers button will be deactivated multiple times when you tap on other features. On the iPad, you can leave the layers button visible at all times.
Understanding the Methodology of this tutorial
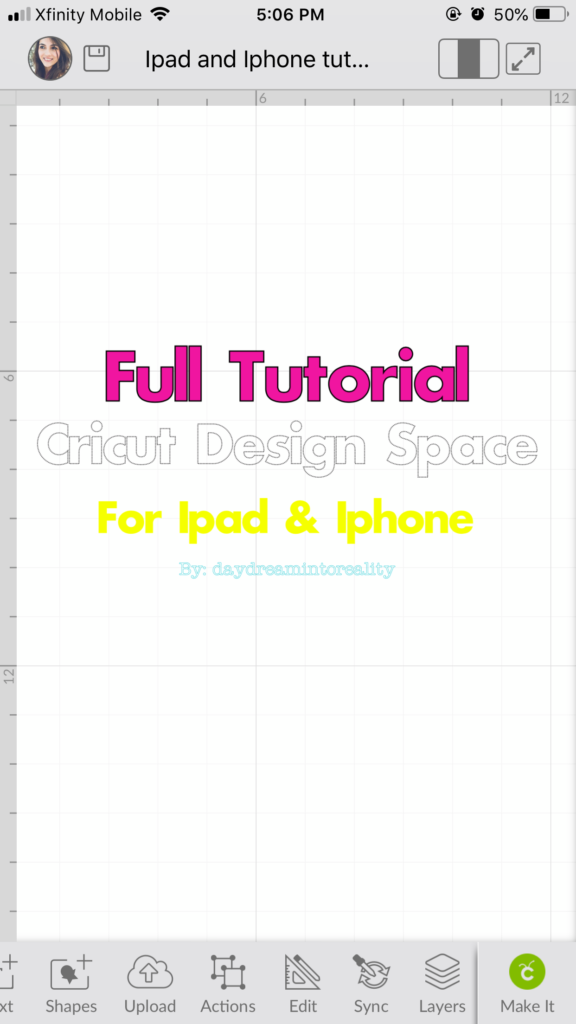
I think the best way to learn is by following along the way so go ahead and – after grabbing a cup of coffee / or tea of course – and open your App from your iPhone or Ipad.
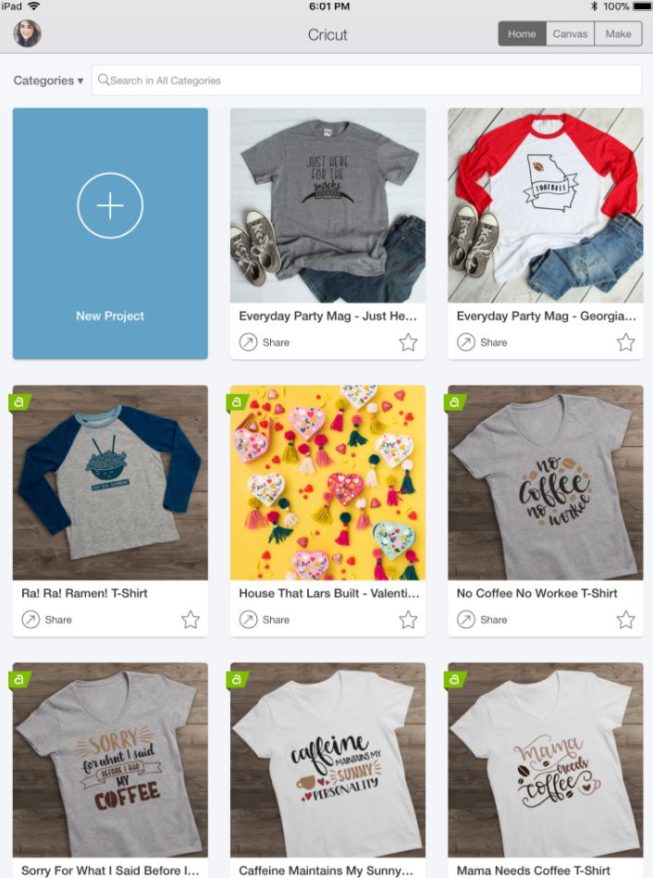
Every time you open your App for the first time you will be in the home section, from here you will be able to choose a ready to cut project, images and or Create a New Project.
When you tap on New Project – the blue square – you will be on the CANVAS AREA; this is the area where we are going to put most of our efforts to learn.
-
When you open the Cricut Design Space App -
App divided in 3 sections
I believe that the best way to learn and master Cricut Design Space is from the beginning! When you have a clear concept of what every icon and panel is for, then you can truly dig in and start exploring further and further.
Sometimes we are quick to jump from project to project – Hey That's ok too! BTDT – But I think that knowing your work area will help you to take your creativity to a whole new level.
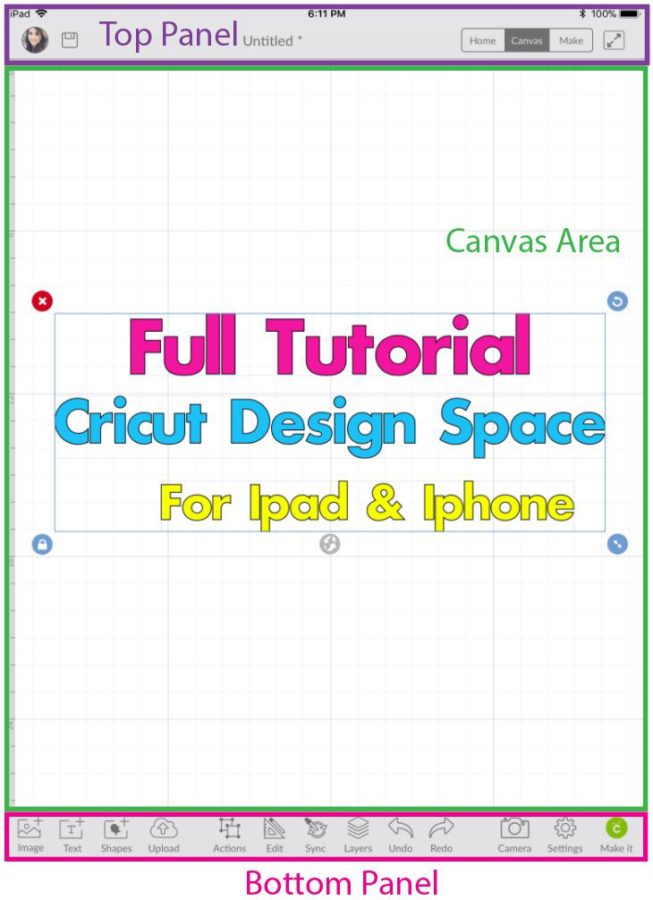
To make this easy for you, I have divided the design area into three different sections. Top Panel (purple) Canvas Area (green / Bottom Panel (pink)
Are you ready to tackle each panel/section and see what happens when you tap any of the options available?
Top Panel
This panel allows you to navigate from the Canvas to your profile, projects, and it also allows you to expand the Canvas Space to the max.
Let's see how every icon works.

a. Profile Picture – Settings

When you tap on your profile picture, a menu will slide open with a couple of settings.
One essential thing about this menu is the Machine Selection.
Before you start on the design process, make sure you select the Cricut you have (Maker or Explore).
You see, the Cricut Maker has options that are only available to that particular machine. So, if you have a Maker and you are designing with the Explore option ON you won't be able to activate the tools that are for the maker.
From this menu, you can also set up your machine and also see a little app overview of how the machine works.
If you are planning on using Print then Cut option with your phone or iPad, this calibration ensures will that everything will go smoothly.
There are other options here that I recommend you to look at. I won't go into detail on them because I want to focus on the design aspect of the App.
b. Save
This option will activate after you've placed one element on your canvas area.
I recommend you save your project as you go, because, even if you are working from your device and the cloud you can run out battery, your App can crash, and if that happens, there goes your hard work with it!
c. Home/Canvas/Make
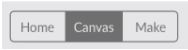
These buttons are shortcodes, and they represent the different views you will have while using the App. The darker area represents your current location.
- Home:will take you right at the beginning if you wanted to replace your current project and add a new one-tap here.
- Canvas: is the place where you design and organize a project before you cut it.
- Make: tap here if you want to cut your project. First, you need to tap Make it on the Bottom Panel.
d. Expand

There are moments, especially when you are working on a small device, that you will want to see your design with ZERO distractions.
When you tap on this option, the Canvas Area will expand, and all other menus will be hidden. To go back to your standard view, tap here.
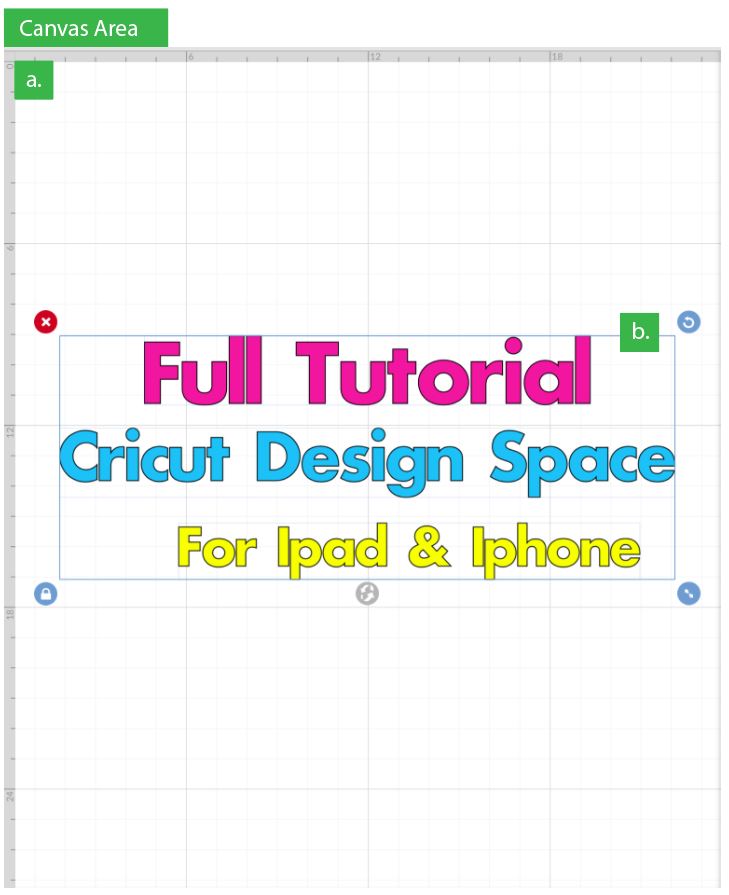
Canvas Area
The Canvas area is where all of the magic happens!
The Canvas is where you play with your designs, get creative, and touch things up before you cut them.
a. Measurements
The canvas area is divided by a grid.
I think this feature is great because every little square you see on the grid helps you to visualize the cutting mat.
You can change the measurements from inches to cm and turn the grid on and off when you tap on the Settings icon located on the bottom panel of the App.
b. Selection
Anytime you select one or more layers, the selection is blue, and you can modify it from all of the four corners.
The red x is for deleting layers. The right upper corner will allow you to rotate the image. Although if you need a specific angle, I recommend you to use the rotate tool located in the bottom panel when tapping the icon Edit.
The little lock keeps the size proportional when you increase or decrease the dimension of your layer with the lower right button of the selection. By tapping on it, you are now able to have different proportions.
There's also a 5th option between the lock and the size option. When you tap on it and drag your design, you can see it from different angles. I think this is helpful if you want to see a 3D perspective (Especially if you have the camera option activated). Once you let go, the selection will go back to its original form
Smart – Hand Gestures
Since we are working with technology, of course, we are going to be using our fingers a lot.
It's an excellent idea for you to see all of the things you can do with the tip of your fingers!
There are six gestures you can use within the App:
- Tap: use a single tap to select an image or layer (also to choose any menu options).
- Swipe: if you need to select more than one image, swipe your finger on your screen to select all the ones you need.
- Tap and hold: You can select an image one by one as well. Do a more prolonged tap and then select another design by doing the same thing. To remove the selection, do a single tap on the canvas area.
- Two Finger swipe: if you need to move around the canvas, you need to use two fingers at the same time. Otherwise, you would be doing gesture #2 (Swipe)
- Double Tap: double-tap to auto-zoom and see all of the elements and designs you have on the canvas area.
- Pinch Zoom: zoom in and out by using your thumb and index finger.
Bottom Panel
We are entering deep waters now and there is no going back!
The bottom panel may feel to you like be the most challenging one because pretty much everything is done from here.
Repeat after me, I can do it and I will!
On the Cricut Design Space Desktop version, all of the options are divided into three panels; but on the App, they are all hanging out together at the bottom, while you get used to it you might get frustrated trying to find the option you want.

Overview
Before we get going with the bottom panel let's have a little overview of what happens when you tap on something.

The bottom panel is grey and has 12 essential menus that allow you to edit your project.
| a. Image | g. Sync |
| b. Text | h. Layers |
| c. Shapes | i. Undo/ Redo |
| d. Upload | j. Camera |
| e. Actions | k. Settings |
| f. Edit | l. Make it |
Every time you tap on one of the options; the icon itself will turn green and the options of that tool will either take you to another window or will slide open in a white menu just like I show you on the screenshot right above.
Note: depending on the size of your device, for you to see the options of the menu, you need to scroll left and right.
You can only use one option at the time, except with the Layers option, This one can be active at all times. However, on your iPhone, the layers panel can become deactivated very often.
This App is very robust, and It has most of the things that the Desktop version has. At the end of this post, there is a list of the things that this App doesn't have.
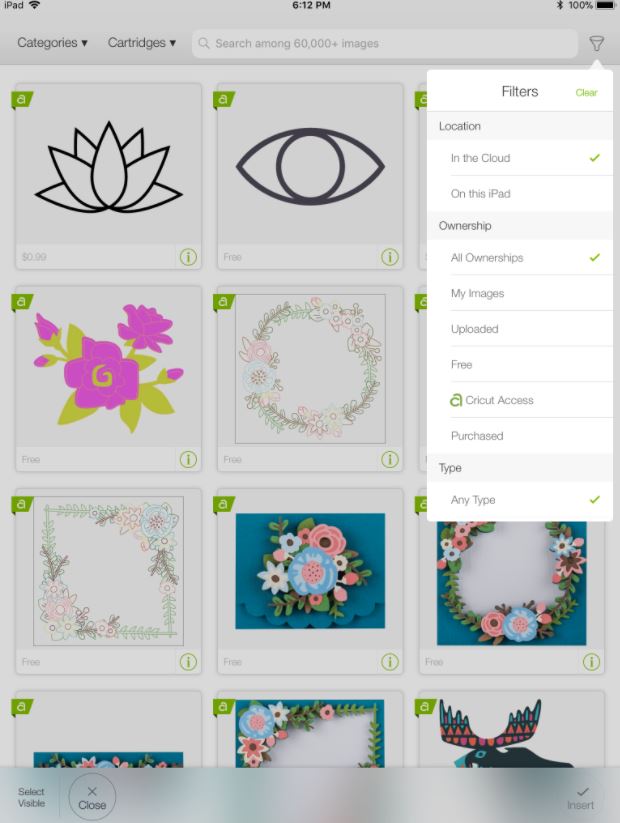
a. Add Image

Images are perfect when you are putting together your projects; with them, you can add an extra touch and personality to your crafts.
You can search them by keywords, categories, or cartridges, and also find images you have previously uploaded to your computer or your device.
Cartridges are a set of images that you need to purchase separately; some of them come with Cricut Access, and some not. The ones that are not available for Cricut Access are brands such as Disney, Sesame Street, Hello Kitty, etc.
Cricut has FREE images to cut every week. You can find them when you tap on Categories.
If you are going to be looking projects in the cloud you would need Internet; but if you are going to use images you have on your device or tools from the App itself you can work without any internet connection.
Cool Right?
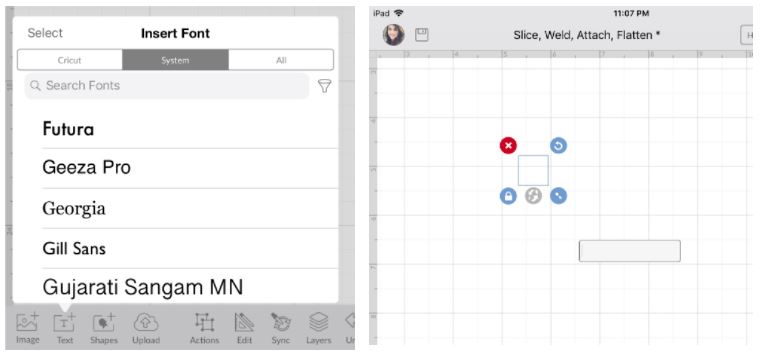
b. Add Text
Anytime you want to type on the Canvas Area you will need to tap on Text.
After you tap you will be prompted to choose the font you want to work with; then a little box will appear on the canvas area for you to type in your text.
c. Add Shapes
Being able to use shapes is essential. With them, you can create simple, less complicated, but still beautiful projects.

There're are nine shapes you can choose from:
- Square
- Triangle
- Pentagon
- Hexagon
- Star
- Octagon
- Heart
The first option is not a shape, but an amazing and powerful tool called Score Line. With this option, you can create folds and score your materials.
If you want to create boxes or love everything about card making, the Score Line will be your best friend.
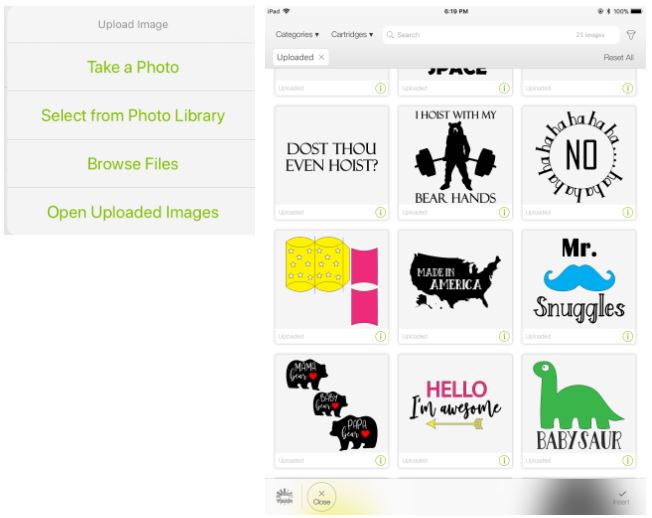
d. Upload

With this option, you can upload files and images you want to cut. When you Tap on upload, you will have the opportunity to choose the location of your photo, or even take one.
The Internet is filled with them; there are tons of bloggers that create projects for free. I am one of them
If you have no idea where to find images or cut files, I have a growing library that you can have access to when you subscribe to my newsletter and become a daydreamer!
Note: some of the uploads you see on the image right down below are inside my fantastic library!
Check out a preview here. Or get access righthere.
e. Actions

The Actions Panel is a very meaty one! From here you can change your design into a whole new one.
Some of the options here might confuse you at first, but as I always say; don't knock it until you've tried it!
Let's see an overview.

Group – Ungroup
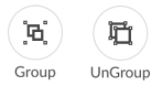
Group: tap here to group layers. This setting is handy when you have different layers that make up a complex design.
Let's say you are working on an elephant. Most likely – and if this is an SVG or cut file – the elephant will be composed of different layers (the body, eyes, legs, trunk, etc.). If you want to incorporate, new shapes, and text; most likely is that you will be moving your elephant across the canvas area a lot.
By grouping all of the elephant layers, you can make sure that everything will stay organize and nothing will get out of place when you move them around then canvas.
Ungroup: This option will ungroup any grouped layers you select on the canvas area or layers panel; this is very useful when you need to edit – size, type of font, etc. – a particular element or layer from the group.
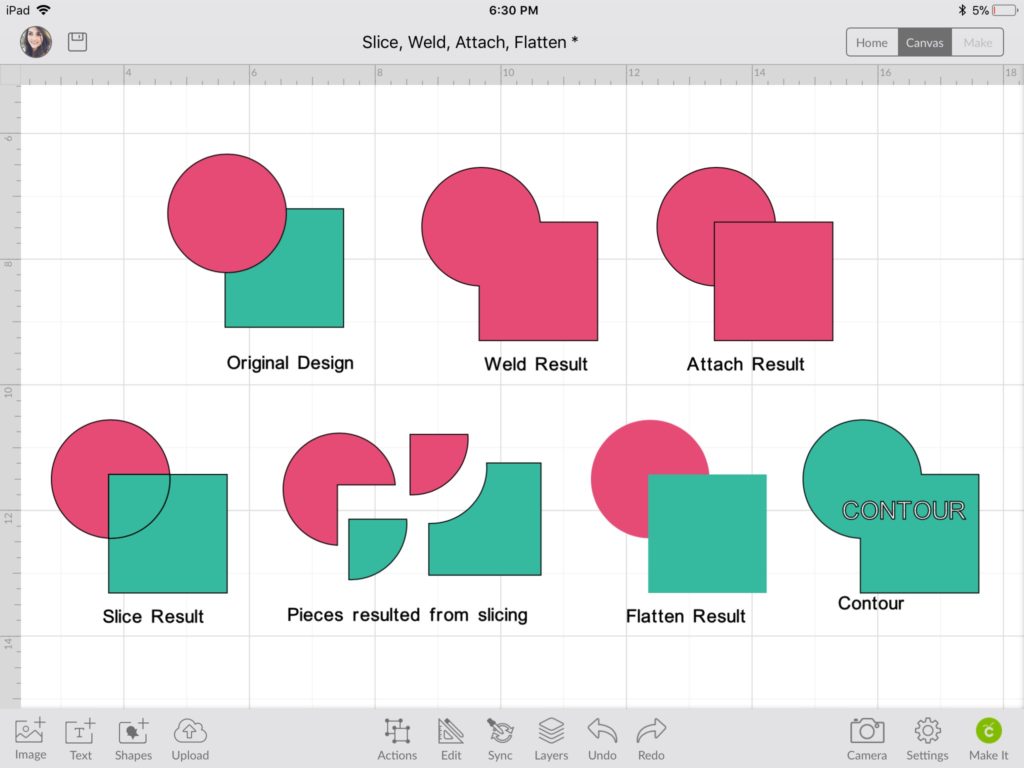
Check out this graphic to understand Weld, Attach, Slice, Flatten, and contour
Attach – Detach
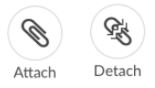
Attach and Detach work like grouping layers, but it's more powerful.
When you select both shapes and tap on attach, both layers will have now the same color – the color is determined by the layer that is on the back – This attachment will remain in place, even after I send my project to be cut.
If you desire to detach your layers, select them again and tap on, detach.
Weld

The welding tool allows you to combine two shapes in one.
When I selected both shapes and tapped on Weld, you can see that I created a whole new shape. The color is determined by the layer that is on the back, that's why the new shape is pink in color.
Slice

The Slice tool is perfect for cutting shapes, text, and other elements, from other designs.
When I selected both shapes and tapped on Slice, you can see that the original file got all cut up. To show you what the final product was, I copied and pasted the Slice result and then separated all of the pieces that resulted from slicing.
Flatten – Unflatten
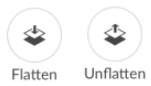
The Flatten tool is extra support for the Print and Cut fill.
When you change the fill from No Fill to Print, that applies to just one layer. But what if you wish to do it to multiple shapes at the time?
When you are done with your design, select the layers you want to print together as a whole, and then tap on flatten.
In this case, the element was converted to Print then Cut. That's why it's not showing a black edge – where the blade will go through – anymore.
Duplicate

This option will duplicate any layers or designs you have selected on the layers panel or canvas area; this is quite helpful because you don't have to recreate the design from scratch. It's like copy and paste.
Hide Contour
The Contour tool allows you to hide unwanted pieces from a design, and it will only be activated when a shape or design has elements that can be left out.
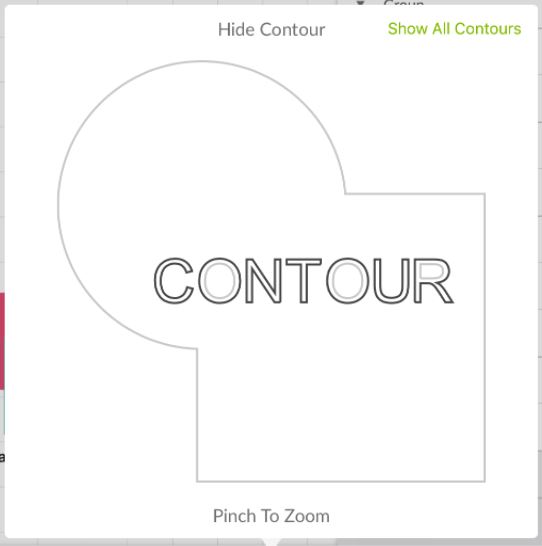
When you tap on contour, a new window will pop up with all of the pieces on the design you can hide on the left.
For this example, I combined the original design in one shape with the weld tool. Then I typed the word contour and sliced it against the new shape, then I hid the inner circles of the two letters O and the inner part of the letter R.
Isolate Letters

This option is only available for text layers. When you select text and tap on Isolate Layers, you will be able to edit every single letter on its own.
The desktop version has more advanced options for text, but this a good start. Maybe one they will add the other options.

The Edit Menu allows you to modify your text even further (if the text is selected on the layers panel). You can also align, arrange, and organize all of the elements you have on the canvas area.
Let's see all of the things you can accomplish when you tap on this menu.

Font
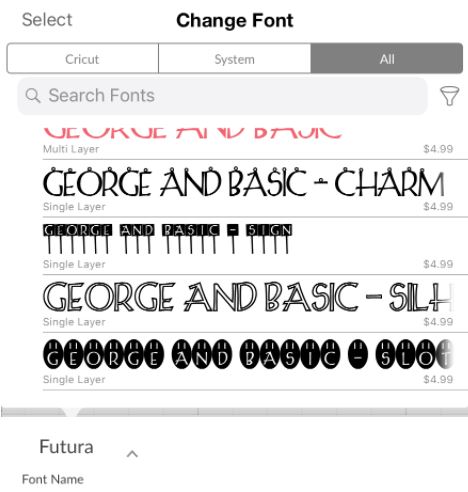
When you tap on this button, you can select any font you want to use for your projects. You can filter them and search for them on the top of the window.
If you have Cricut Access, you can use any of all the fonts that have a little green A at the beginning of the font title.
However, if you don't have Cricut access, Make sure you use your system's fonts; otherwise you will be charged when you send your project to cut.
If you want to know what Cricut Access is and whether it is worth it or not, make sure to check out this guide.
Style
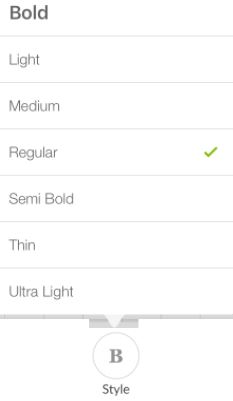
Once you pick your font, you have the option to change its style.
These are the most common options:
– Regular: This is the default setting, and it won't change the appearance of your font.
– Bold: It will make the font thicker.
– Italic: It will tilt the font to the right.
– Bold italic: it will make the font thicker and lean it to the right.
Sometimes the font itself will have more or fewer options, The one I used for this screenshot had way more options.
Tip: If you are using Cricut fonts, you will see that with some of them, you can also use the write option.
Alignment
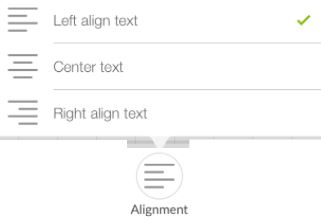
This alignment is exclusive for text. It's excellent for you to organize paragraphs and lines of text.
These are the options you have:
– Left: Align a paragraph to the left
– Center:Align a paragraph to the center
– Right: Align a paragraph to the right.
Size, Letter, and Line Space
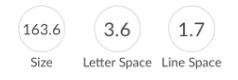
I can't express enough how AMAZING these options are. Especially the letter spacing.
Font Size: You can change it manually from here. I usually adjust the size of my fonts from the canvas area.
Letter Space: Some fonts have a considerable gap between each letter. This option will allow you to reduce the space between letters very quickly. It's seriously a game-changer.
Line Space: this option will tackle the space between lines in a paragraph.; this is very useful because sometimes I am forced to create a single line of text because I am not happy with the spacing between lines.
Line Type and Fill
This option will tell your machine what you are going to do with your machine.
Keep in mind that depending on the machine you have selected on the top of the window (Maker or Explore), you will have different options.
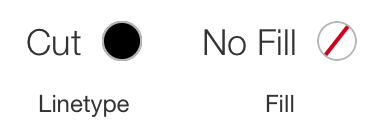
Linetype
This option will tell your machine when you tap on Make it what tool you will be using; right now there are seven options (Cut, Draw, Score, Engrave, Deboss, Wave, Perf).
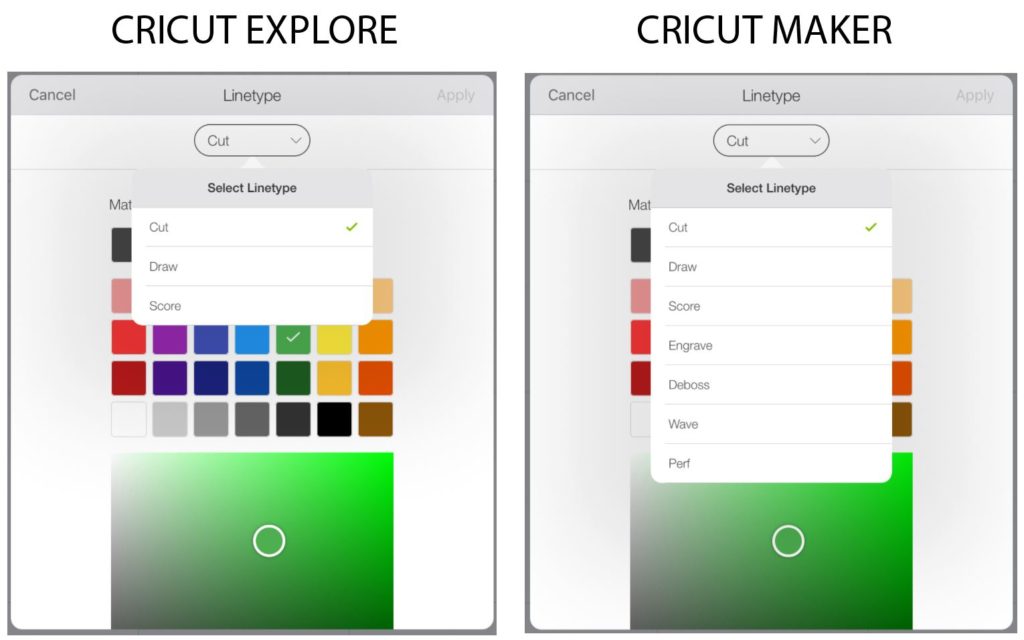
If you have a Cricut Maker, all options will be available, but if you have an Explore you will only have the Cut, Draw, and the Score option.
Here is a more in-depth explanation of each tool.
Cut
Cut is the default linetype that all of your elements on your canvas will have; this means that when you press MAKE IT, your machine will cut those designs.
With the Cut option selected, you can change the fill of your elements, at the end of the day, this translates in the different colors of materials you will use when you cut your projects.
If you need help with learning about the Cricut Blades and the differences, I totally recommend you thisultimate guide and tutorial I put together.It's the best on the web, just like this tutorial
Draw
If you want to write on your designs, you can do it with your Cricut!
When you assign this linetype, you will be prompted to choose any of the Cricut Pens you have (You need specific pens, unless you have a 3rd party adapter). When you select your design, the designs on your canvas area will be outlined, with the color of the pen you picked.
With this tool, when you click Make it, instead of cutting, your Cricut will write or draw. Note: This option DOESN'T color your designs.
Score
Score is a more potent version of the Scoring line located inside the Shapes Menu. When you assign this linetype to a layer, all of the designs will appear scored or dashed.
This time, when you click on Make it; your Cricut won't cut, but it will score your materials.
For these types of projects, you will need the scoring stylus or the scoring wheel. However, keep in mind The wheel only works with the Cricut Maker.
If you have doubts about what materials you need, I recommend you to read this article. It's the ultimate guide for you to learn, what accessories and materials you genuinely need.
Engrave, Deboss, Wave, and Perf (New)
These are the newest tools that Cricut has released for the Cricut Maker machine, and with them, you will be able to create amazing effects on different types of materials.
They work with the Quick Swap Adaptive Tool, so if you already have one, you can buy the tips.
I just got these tools in the mail, and once I have tutorials for them I will link to them.
Fill
The fill option is mainly to be used for printing.
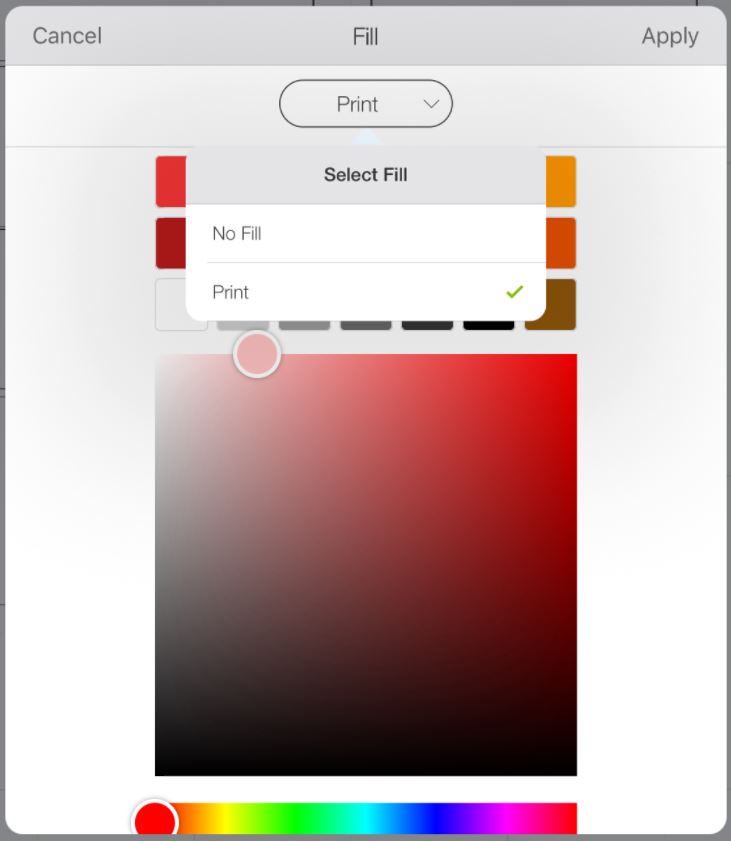
It will only be activated when you have Cut as a "linetype."
No Fill means that you won't be printing anything, basically is when you are just cutting your design out of your materials.
Print is by far, one of the best features Cricut has. This option allows you to print your designs and then cut them; this is quite handy, and what motivated me to get the Cricut in the first place.
I design tons of printables for kiddos and adults, and for taking photos – for my posts – I had to cut every single little thing!
Ahhhgggg, I seriously wanted to cry every time. I am a lefty, and scissors make my hands hurt. So, Cricut is a live saver for me.
Anyway, getting back to the Printing option…
When Fill is active, and you click on Make it; first, you'll send your files to your home printer and then have your Cricut do all the heavy lifting. (Cutting)
Size
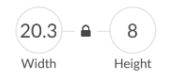
Everything you create or type on the Cricut Design Space canvas has a size. You can modify the size from the element in self (when you tap on it). However, if you need an item to have an exact measurement, this option will allow you to do so.
Something fundamental is the little lock on that measurement. When you increase or reduce the size of an image, the proportions are always locked. By tapping on the small lock, you are telling the App that you don't want to keep the same dimensions.
Rotate

Just like size, rotating an element is something you can do very quickly from the canvas area. However, some designs need to be rotated on a specific angle. If that's the case for you, I recommend you to use this function. Otherwise, you will spend so much time fighting to get an element angled the way you want it to be.
Flip
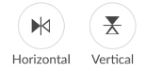
If you need to reflect any of your designs on the Cricut Design Space, this is a great way to do it.
There are two options:
– Flip Horizontalwill reflect your image or design horizontally. Sort of like a mirror; It's handy when you are trying to create left and right designs.
Example: You are building some wings, and already have the left side; with Flip, you can copy and paste the left wing, and voila! Now you have both (left and right) wings!
– Flip Vertical: This will flip your designs vertically. Kind of like you would see your reflection on the water. If you want to create a shadow effect, this option is a good way to go.
Position
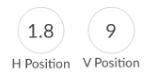
This box shows you where your items are on the canvas area when you click on a specific design.
You can move your elements around by specifying where you want that element to be located on the canvas areas. It's handy, but it's a more advanced tool.
I don't use it that much because I can get around better with the alignment tools I mentioned above.
Arrange

When you work with multiple images, text, and designs, the new creations you add to the canvas will always be in front of everything. However, some of the elements of your design need to be in the back or front.
With the arrange option, you can organize the elements very easily.
Something great about this function is that the program will know what item is on the front or back and, and when you select it, Design space will activate the available options for that particular element.
– Send to back: This will move the selected element all the way to the back.
– Move Backward: This option will move selected the item just one step back.
– Move Forward: This option will move the element just one step forward. Usually, you would use this option when you have 4 or more elements you need to organize.
– Sent to front: This option will move the selected item to the front.
Alignment

This function allows you to align all of your designs, and it's activated when selecting two or more elements.
– Center:When you tap on Center, you are centering, both vertically and horizontally one design against another one; this is very useful when you want to center text with a shape like a square or a star.
– Align Left:When using this setting, all of your elements will be aligned to the left. The furthest item to the left will dictate where all of the other parts will move.
– Align Center:This option will align your elements horizontally; this will entirely center text and images.
– Align Right:When using this setting, all of your elements will be aligned to the right. The furthest element to the right will dictate where all of the other elements will move.
– Align Top:This option will align all of your selected designs to the top. The furthest element to the top will dictate where all of the other elements will move.
– Align Middle:This option will align your designs vertically. It's handy when you are working with columns, and you want them organized and aligned.
– Align Bottom:This option will align all of your selected designs to the bottom. The furthest element to the bottom will dictate where all of the other elements will move.

Distribute
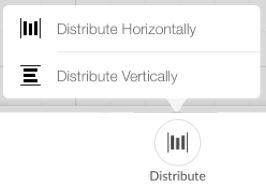
If you want the same spacing between elements, it's very time consuming to do it all on your own, and it's not 100% right.
The distribute button will help you out with that. For it to be activated, you must have at least three elements selected.
– Distribute Horizontally:This button will distribute the items horizontally. The furthest left and right designs will determine the length of the distribution; this means that the elements that are in the center will be distributed between the most distant left and right designs.
– Distribute Vertically:This button will distribute the items vertically. The furthest top and bottom designs will determine the length of the distribution; this means that the elements that are in the center will be distributed between the most distant top and bottom designs.
g. Sync

Every color on your canvas area represents a different material color. If your design has multiple shades of yellows or blues; are you sure you need them?
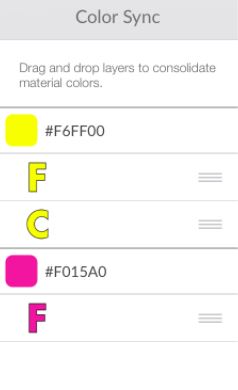
If you only need one shade of yellow, like this example. Just tap and drag the tone you want to get rid of and drop it on the one you want to keep.
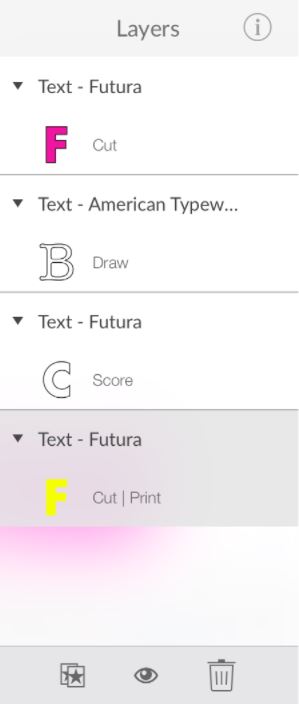
h. Layers

When you tap on the layers icon, a panel will slide open on the right. From here, you can see the linetype of each layer.
Before I get into all of the details, and to set you up for success, let me give you a little introduction of what a layer is.
Layers represent every single element or design that is on the canvas area.
Think of it like clothing; when you get dressed, you have multiple layers that make up your outfit; and depending on the day, or time of year, your outfit can be simple or complex.
So, for a freezing day, your layers would be underwear, pants, shirt, jacket, sock, boots, gloves, etc.
And for a day at the pool you would only have one layer; a Swim Suit!
The same happens with a design. Depending on the complexity of the project you are working on, you'll have different types of layers that'll make up your entire project.
For example, let's pretend that you are designing a Christmas Card.
What would this card have?
Maybe a text that says Merry Christmas, a tree, the card itself, perhaps an envelope as well?
My point is that all of the little designs and elements that make part of that project are layers.
Some layers can be modified; However, other layers, like JPEG and PNG images, can't; this is because of the nature of the file or the layer itself.
For instance, a text layer can be converted into other types of layers; but, when you do that, you'll lose the ability to edit that text.
As you go, you will learn more about what can or can't do with layers.
I hope that gave you a good idea of what a layer is! Now let's see what happens when we tap on this icon.
Visibility, Duplicate and Delete
These three options are located at the end of the layers panel, and depending on the layers, you select you to duplicate, hide, or delete.
Duplicate
This option will duplicate any layers or designs you have selected on the layers panel or canvas area.
Layer Visibility
The little eye that appears at the end of the layers panel represents the visibility of a design on the canvas areas.
When you are not sure whether an element looks good on the canvas area, instead of deleting it, tap one the little eye to hide that design.
Note: When you hide an element, the eye will have a cross mark.
Delete
This option will delete any elements you have selected on the canvas area or layers panel.
i. Undo – Redo
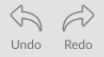
Sometimes while we work, we make mistakes. These little buttons are a great way to correct them.
Tap Undo when you create something you don't like, or make a mistake. Tap Redo when you accidentally delete something you didn't want to delete or modify.
j. Camera

When you tap on the Camera button, you can see what your camera is displaying. NO, you can't take a photo or use it for your design; this is mainly a visual aid for you.
For instance, if you are cutting a design for a card, you can overlay it over the real thing before you cut it!
k. Settings
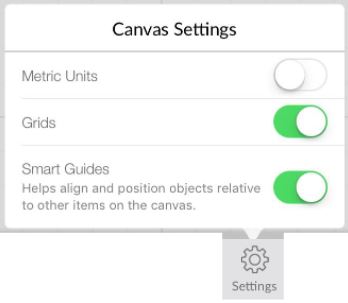
When you tap on settings, you can choose whether you want to use metric units or not.
Also if you prefer to work with clean canvas – no grid whatsoever – you can turn it off.
Last but not least, you have the Smart Guides options; THIS IS FANTASTIC! Pretty much I leave it on all the time. Smart Guides will help you position and align new objects with the ones you already have on the canvas area.
l. Make it

Finally, "Make it" is the last icon of the Cricut Design Space App; tap on it once you finish with your design, and you are ready to cut it.
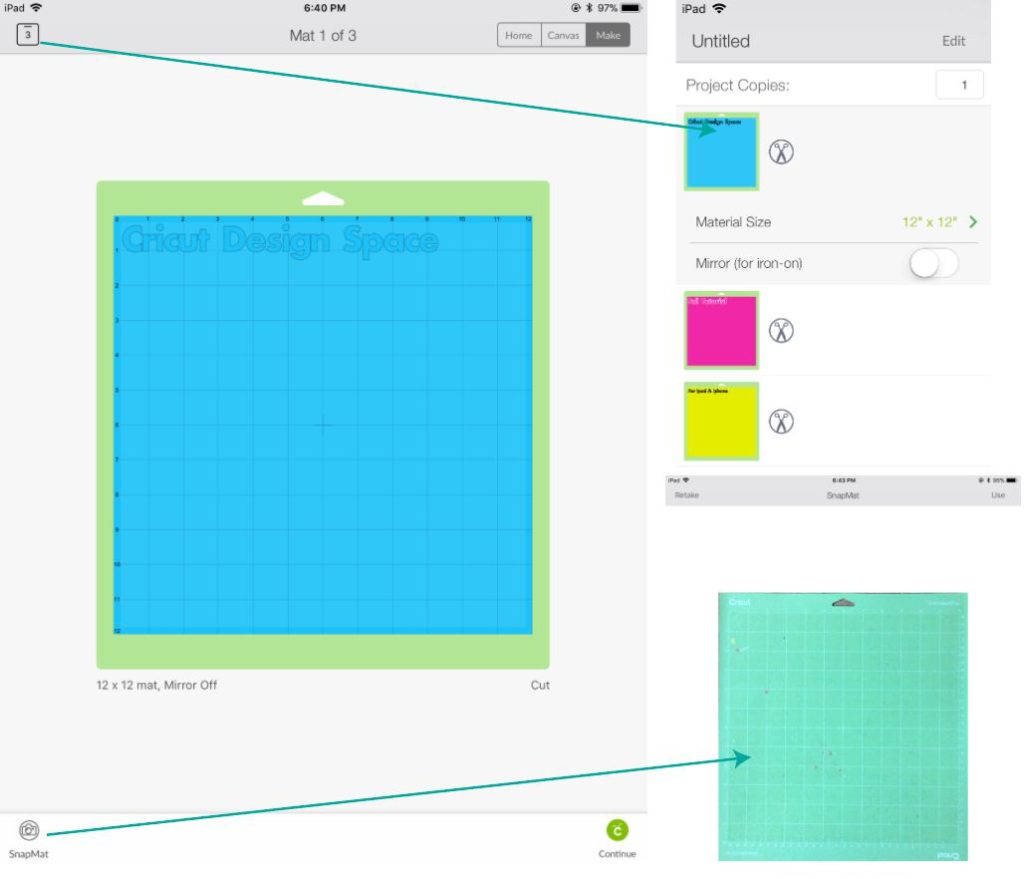
Project Copies
If you need to cut more than one project, this is the place for you to do it. Tap on the little square on the upper left corner or your device.
If you need to cut more than one project, this is the place for you to do it. Tap on the little square on the upper left corner or your device.
Snap Mat
On the bottom left corner, there's a little icon called SnapMat. This an extremely cool tool for you because it allows you to visualize and then choose where to cut your designs precisely.
When you tap on this icon your camera will be activated, and then you will take a photo of your mat (with the material you want to use already in place), then you can move your design around where you want it to be.
Continue
When you are ready to cut, tap on continue. Here you will be given the option to choose your materials and the specific blade and other accessories you will need.
Differences between the Cricut Designs Space App and Desktop
Although the Design Space App is complete, and you can do pretty much anything you can think of. There are some features that the desktop version DOES have.
I don't want you to break your head trying to find those features on the App so let me list them for you:
- Select All: a button that allows you to select all of the elements and layers you have on the canvas area.
- Curve Text: The feature that allows you to curve text can only be found and used in the desktop version.
- Advanced (Ungroup to layers and lines): The Design Space App won't allow you to ungroup fonts to lines – when you have a paragraph – or to layers when you have a Multi-Layer font. You can only ungroup to letters.
- Patterns: unfortunately, you can only use and upload patterns on the desktop version.
- Templates: are an excellent way for you visualize where your designs will go. This feature is only available on the desktop version. Read the full tutorial here.
- SnapMat (Only on the App): finally something cool that the desktop version doesn't have! This option allows you to choose the exact location – on your mat – you want your Cricut to cut.
I have a full tutorial for the Cricut Design Space Desktop version, and I recommend you check it out!
Congratulations!
If you made it this far this means you are not a beginner anymore. Now, you know how to navigate and use your Cricut from your phone and/or Ipad!
Design Space App For Iphone
Source: https://www.daydreamintoreality.com/cricut-design-space-app-tutorial-ipad-iphone/
Posted by: trujillowito2001.blogspot.com
0 Response to "Design Space App For Iphone"
Post a Comment