

Windows Backup Encountered An Error When Writing Data To The Backup Target
Summary :

When you running the built-in backup software – Backup and Restore (Windows 7), you may encounter the error 0x80780166. This post shows how to solve this Windows backup error. Besides the Windows snap-in tool, you can also use MiniTool software to back up the OS.
Some users complain that when they used the Windows snap-in backup tool – Backup and Restore (Windows 7) to back up the OS, they encountered the error 0x80780166. The Windows backup error often occurs on Windows 7, 8 and 10.
Meanwhile, what may cause this Windows backup error 0x80780166? In fact, there are a lot of reasons giving rise to the Windows backup error 0x80780166. Here, we list some of them.
- Corrupted system files
- Incorrect status setting of Volume Shadow Copy service.
- Corrupted data inside the WindowsImageBackup folder.
- Underlying file corruption.
No matter what the reason is, the most important thing is to fix the Windows backup error 0x80780166. So, in the following section, we will show you how to solve the Windows 10 backup 0x80780166.
Solution 1. Set VSS to Automatic
As we have mentioned in the above section, the error 0x80780166 may be caused by the incorrect status of the Volume Shadow Copy service. So, in order to solve the Windows backup error 0x80780166, try to set the service status to automatic.
Now, here is the tutorial.
Step 1: Press Windows key and R key together to open Run dialog, then type services.msc in the box and click OK to continue.
Step 2: In the pop-up window, scroll down to find out the Volume Shadow Copy service and right-click it. Then choose Properties to continue.

Step 3: In the pop-up window, change the Startup type to Automatic, change the Service status to Started, and then click Apply and OK to confirm the changes.

When all steps are finished, you can run Windows backup again to check whether the error 0x80780166 is solved.
Solution 2. Clean the WindowsImageBackup Folder
If the drive where you want to store the backup contains the leftover files of the previous backups, you may encounter the Windows backup error 0x80780166. Thus, you can try cleaning the WindowsImageBackup folder to solve this problem.
Now, here is the tutorial.
Step 1: Open File Explorer and navigate to the drive you want to save the backups.
Step 2: Look for the WindowsImageBackup folder and double-click it to access it. If you can't see it, please go to the View tab and check the option Hidden items to continue.
Step 3: Once the WindowsImageBackup is visible, select it and delete everything in it.
After that, run Windows backup again to check whether the error 0x80780166 is solved.
Solution 3. Run SFC and DISM Tools
If there are corrupted system files on your computer, you may also encounter the Windows 10 backup 0x80780166 error when running Windows backup. So, in order to solve this error, try running SFC and DISM tools to fix the corrupted system files.
Now, here is the tutorial.
Step 1: Type Command Prompt in the search box of Windows, choose the best-matched one, then right-click it to choose Run as administrator to continue.
Step 2: In the pop-up window, type the command sfc /scannow and hit Enter to continue.
Step 3: Do not close the command line window until you see the message verification 100% complete.
Step 4: When the process is finished, run Windows backup again to check whether the error 0x80780166 is solved.
Step 5: If the sfc sannow fails to work, you can run DISM tool.
Step 6: Type the following commands and hit Enter to continue after each command.
Dism.exe /online /cleanup-image /scanhealth
Dism.exe /online /cleanup-image /restorehealth
When all process is finished, you can run Windows backup again to check whether the error code 0x80780166 is solved.
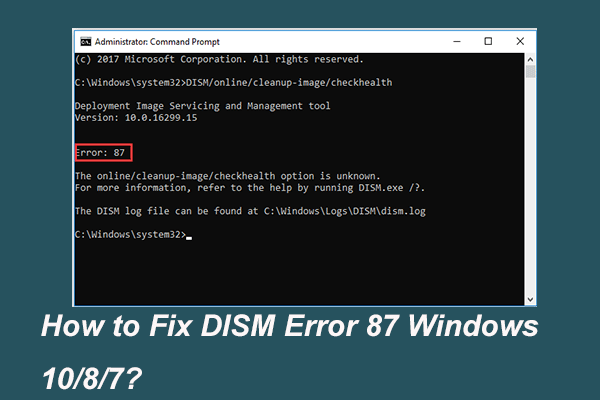
When you run DISM tool to prepare and fix some Windows images, you may receive an error code like 87. This post shows how to fix the DISM error 87.
Solution 4. Try a Third-Party Backup Software
If the above solutions are not effective, you can try to run third-party backup software. Thus, the professional backup software – MiniTool ShadowMaker is strongly recommended.
MiniTool ShadowMaker is designed to back up the operating system. It can also be used to back up files, folders, disks, and partitions. So, in order to back up the operating system, MiniTool ShadowMaker is efficient. Hence, you can download it from the following button to continue.
Free Download
Now, we will show you the tutorials to back up the OS.
Step 1: Download MiniTool ShadowMaker, install it, launch it, and click Keep Trial to continue. Then choose Connect in This Computer to enter its main interface.

Step 2: MiniTool ShadowMaker is designed to back up the operating system. So, it chooses the OS as the backup source by default. Then click Destination module to choose the destination path to save the backups.
Step 3: After selecting the backup source and destination, click Back up Now to perform the task immediately.

When it is finished, you can successfully create a system image. With this professional backup software, you will not encounter the Windows backup error 0x80780166 any longer. In addition, you can also read the post How to Back up Windows to Safeguard Your Computer? Try MiniTool! to look for more ways to safeguard your PC.
Final Words
To sum up, this post has introduced 4 ways to solve the Windows backup error 0x80780166. If you come across the same issue, try these solutions. In addition, MiniTool ShadowMaker would be an efficient and comprehensive program to create a system image.
Windows Backup Encountered An Error When Writing Data To The Backup Target
Source: https://www.minitool.com/news/0x80780166.html
Posted by: trujillowito2001.blogspot.com
0 Response to "Windows Backup Encountered An Error When Writing Data To The Backup Target"
Post a Comment